Showing posts with label African Reign Safaris. Show all posts

Sunday, 1 November 2015

How do I prepare?

Mount Kilimanjaro is definitely one of the most climbable mountains because of its low technicality.  In other words, you need legs and feet instead of ropes and ladders.  And there have been climbers in wheelchairs so legs and feet are also not 100% necessary.


But how does one prepare for this 70km walk?  Where does one start? How long before the time should one start?  These are all questions our team asked and not all followed the same advice.  It is important to note that each person has a different fitness level and you should base your preparation on your current fitness level  If you are a relatively active person who visits the gym al least once a week you will need to start training about 3 months before the climb.  If you are a couch potato who has never been to the gym and who is only doing this to prove something, you might have to abandon the idea and go with something else.  However, if you walk often and climb stairs instead of the lift you can start about 6 months before the climb.

Our group was a bit nervous so we started about a year before the time.  Our very first fitness test was a 10km hike in tennis shoes, carrying small water bottles and no snacks.  I couldn't talk much because I was so out of breath!  And I am an active person, seeing the inside of the gym at least once a week.

It is definitely a good idea to start with something like a long hike.  10 to 15 km on the very first try.  This will give you a mental gage.  Try to do a long hike at least once a month if you plan to start a year in advance.  If you are comfortable to start 3 months before, take a hike each weekend.  Try to pack your daypack with all the goodies you would take onto the mountain.  Always fill up your hydration pack even if you won't use it all.  Always have breakfast - I like a boiled egg or two.


Preparation
Day 1
1-hour aerobics in the gym or similar - gardening won't cut it, it needs to be more intense than that.
Day 2
Suburban hike - find a route, preferably with a steep hill, in your neighbourhood.  Try to walk for at least 3 hours.  You have to walk briskly as if you are going to miss the bus.  Otherwise, there is no point...
Day 3
Endurance - my suggestion would be to choose a hill and walk up and down as many times as possible in a set time - at least 2 hours.  You have to be out of breath. It prepares you for those out of breath moments on top of the mountain.  If you live in a ver flat area, join the gym and set the treadmill to very steep.  It is not really the same but try and make the best out of it.  The hill prepares you for the uphill you will face daily.
Day 4
Rest - although it is better to do something each day but be careful not to over train.  You won't overtrain your body but your mind will probably get tired of doing the same thing each week.
Day 5
Resistance - do an hour of resistance training at the gym.  Focus on legs as they will have to be strong on the downhill.
Day 6
10 to 15 km hike in a bushy, rocky area.  Groenkloof Nature Reserve works very well as well as Fearie Glen Nature Reserve.  I am sure there are lots of rocky trails in Johannesburg and Krugersdorp.  Cape Town has the best options of course.  I am almost sure KwaZulu Natal even better.
Day 7
I would rest again but you could do an hour long suburban walk... Depending on your fitness level.

You could mix it up a bit and add some swimming or running.  You should do what you like.

1.  Train you legs and feet to get used to up and downhills
2.  Train your lungs for the out of breath feeling
3.  Train your mind for the long hikes that feel like they will never end
4.  Get used to your climbing party
5.  Get used to your gear

Be careful of sprains and strains - you don't want to end the trip before it starts.  Also ALWAYS wear two pairs of socks.  even if it is very warm - it will prevent blisters.

www.africanreignsafaris.com


Wednesday, 17 June 2015

Backpack back track

On my first Kilimanjaro climb, I carried the suggested day pack which included a lot of things.... The thing is if you don't have the backpack you may need something.  If you do have it you might overfill it...

The suggested day pack inclusions should be as follows:

Hydration Pack
Rain Jacket
Rain Pants
Camera
Snacks
Extra Water Bottle
Medication
Hat
Sunblock
Vaseline

I had a smaller day pack and it was heavy.  So next time I will rather carry a hydration pack and a moon bag.


In the rain forest, I will wear very thin gym clothes that can dry quickly if it rains.  Then I don't have to carry a rain jacket or rain pants on day one. I would rather pay an extra porter who must walk close to me in case I need to take out a full set of clothes.  I will share the porter with my travel buddies so that he can carry a full-size backpack with our extra stuff.

You really don't want to carry a lot of extra stuff.  The walk is tough enough as it is.

I will also not carry a lot of extra snacks... I will make sure I eat a fatty protein breakfast.  I will request a boiled egg to last me until lunch.  I will however still down a bottle of Rehadrat Sport before I start each day.

The moon bag (or fanny pack as some people refer to it) should be big enough for my phone (which doubles as a camera) vaseline, sun block, buff and thin gloves.

I used my hiking poles all the time so there is no need to store them or hook them to a backpack.  On my new hydration pack, there are enough bungee cords to fasten poles if need be...

One is not allowed to take any disposable plastic water bottles up the mountain but find a soft plastic one.  Or maybe a silicone one.


Saturday, 13 June 2015

I didn’t think I could do it

A short list of things I never thought I would be able to do

Climbing Mount Kilimanjaro

When my friends and I were sitting around one evening with too much wine in hand somebody mentioned that we should do something exciting.  We should climb Mount Kilimanjaro.  Of course, I said yes!  I had too much wine at that point.  I didn’t really think that I would ever do something that extreme.  But in the back of my mind I knew that if I said I would do something, I would.  Even if I had to almost die!  This big decision came about a year and a half before the actual time.  I had a lot of time to mentally and physically prepare.  I did it and I didn’t ever think I could.

Using the bushes as a toilet

I remember as a child we travelled to the coast each school break we had.  One year during the winter break it snowed on the road.  Snow in South Africa is rare so you can just imagine the excitement.  A truck skid of the road and caused a 7-hour delay on the highway.  In the 1980’s there was no real roadside convenience…  So if you had to pee you had to use the road.  I had never used nature as a toilet.  And I wasn’t planning on it.  I remember that my sister took the plunge but I just held on.  On Kilimanjaro there are toilets.  At the camps yes.  On the path no.  So here I went on this journey, never used the bush as a toilet and facing a week of outside loo breaks.  I did it!  It was easier to use the bush than using the camp facilities.  It was cleaner too.  Today I am I cured of my fear of using the bush as a toilet and can thank Kili for it!


Wednesday, 10 June 2015

Charging on top of the world

I am the type of person who is really attached to my phone.  My phone is my world.  Camera, messaging, coolness and Facebook.  Naturally, I was worried that I could not use my phone on top of the world.  But a lot of people say that there is very good signal on the roof of Africa!

When I started this whole journey may aim was to let everybody know what was going on.  I planned it all out.  I would post on Facebook as much as possible - or as long as my battery would last.  I bought a solar panel to charge my phone and camera.  I even got a chargeable battery in case there was not enough light to charge directly from the solar panel.


When arriving in Moshi I took a stroll to the nearest cell phone (mobile) shop.  I purchased a pay-as-you-go sim card which was valid for a month.  It had unlimited data and an amount for calls and text pre-loaded.  I think it cost around R100 or something.

My plan was to write an update each day and post on Facebook and send updates via WhatsApp.  It turned out that sending stuff home via WhatsApp and asking them to post on Facebook was much quicker.  So tip number one I would say is to consider the posting carefully :)

Once we started our journey up the mountain I felt like I had to document each moment.  Subsequently, I probably missed out on a few things...  In most of the pics, I am standing with the stupid cell phone in my hand!!

Tip number 2 would be to put my phone on aeroplane mode and only switch the aeroplane mode off once in camp.  It saves on battery life while making it possible to take pics and make notes.

Once we got to the summit the only thing that still worked was my phone.  Probably because it was close to my body.  The GoPro died just after the summit - so I could at least make a short video clip with that.

The solar panel worked very well.  It was compact and light weight.  Just a pity that more people used it than I did.  My suggestion is to ban all cell phones in your group and just have 1 person doing the documentation.

Bottom line, signal is ok.  Not great but ok.  It's very easy to get a local sim card.  Data is cheap.  If you wanted to you could make a call on the roof of Africa.  Leave your expensive stuff at home - they are bound to get damaged.  My poor chargeable battery got knocked around by somebody or something.

The professional cameras are hard to charge.  They have specific batteries.  Small digital cameras charge easier.  I would say leave all of that (unless you are a professional photographer and you have a few extra external batteries) and use your smartphone.  It will take great pictures and you can keep it close to your body, making it last up to the summit.  According to the experts, it is the cold that makes the battery die.

When I go again in 2016, I will definitely not be posting each and every day.  I will make notes in the evening before bed and I will rather focus on taking more awesome pictures.

www.africanreignsafaris.com

Tuesday, 6 January 2015

These boots are made for walking

Hiking boots are probably the most important thing during your climb up Mount Kilimanjaro.  In South Africa, we don't really get a wide range of snow boots.  Our weather is pretty mild in comparison with the Northern Hemisphere.

When I started preparation for this adventure, I tried on ONLY 2 pairs of boots.  I don't know why... I mean there are so many boots on sale and I just looked at 2 different ones.

Firstly I believe that the boot needs to be high.  It protects your ankles (the last thing you need is a sprain or strain on the highest free-standing mountain in the world) and it keeps you warm.  Secondly, the shoe needs to be waterproof.  Not water resistant, WATERPROOF.  The other thing you don't want is a boot soaked in water.  They don't dry out - even in normal weather let alone freezing temperatures. Thirdly they should have soles that are tough and can grip successfully.  You will spend 6 to 8 days on your feet so the soles need to be strong enough for you not to feel each and every small rock after 2 hours.  Gripping is important especially on the way down. Finally, I believe that boots need to be light weight.  Each kilogramme you have to lift feels like ten at low altitude.

Cape Union Mart had a few options to choose from however at the moment (Dec 2014/Jan 2015) they only have 1 men's boot that may be able to do the job.  And not even the staff is convinced.  Let's hold thumbs that their new stock will arrive soon!

I went for this one.  The Salomon COSMIC 4D 2 GTX®

This is the men's version and I took a size larger than I usually wear.  You don't need to wear these in like in the old days.  If you buy them the day before you start your climb you will be able to climb without issues.  This make of shoe is small.  So if you have a wide foot or high bridge it is not for you.  That's why you need to try on a few.

They did a really good job.  This is them after the climb. I replaced the laces with elastic laces.  Too many people spoke of fingers not being able to lace boots because of cold so I went for an elastic. My feet were so ice cold during the summit.  So I don't think this boot will do in colder temperatures.

I think if it rained then I would have had wet shoes.  They say that they are waterproof but I am not convinced.  I didn't test water on them though...  I did not have any blisters and only my toes were a bit sore on the last day.  My socks were too tight.

In future, I may think about Keen boots.  They are wider and warmer.

I am sure there are many boot options to go for. Just try them all on and think about them being warm and waterproof.  It is a pity you can't take them back if you test them in water :)

www.africanreignsafaris.com


Monday, 5 January 2015

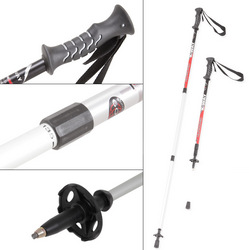
Are Hiking Poles Really Necessary?

I didn't read too much about hiking poles before we left other than looking at prices online.  The marketers that sell tours and get kick backs from certain famous shops like to try and punt all the unnecessary gear... And I thought poles were a bit overkill.

I saw pics of people hiking with just one pole which had a handle much the same as a normal walking stick or cane.  I had a look at the different ones available in stores and they all seemed the same.  Retractable shaft and wrist straps were standard.  All had protective rubbers on their ends and most had a little round "thingy" that I didn't know much about.  OK, I didn't know anything about it.

Turns out I left my job for a new one and the farewell gift were 2 K-Way Kilimanjaro Hiking poles from Cape Union Mart.  Yeah! Something I thought I didn't really need which I got as a gift.

K-Way, Hiking Poles, Kilimanjaro

My hiking buddies said: "you need to practice with those". So, off I went, hiking poles ready.  Man what an effort.  They are either in the way or too long or the terrain is too rocky... so I decided to take them to Tanzania with me and NOT to practice with them.

Unknown to most the rubber is not meant for rocky terrain but to protect the inside of your bags during the flight.  They fit into the duffel bag easily and I held thumbs that the airline staff would not force my bag into a funny position for them to be destroyed!  On arrival, they were fine and so was my bag...

On day one I had them ready.  I even fixed a GoPro to the handle in case I only wanted to use it as a monopod or extension pole.  I found out that even a GoPro is heavy and I had to swap sides every day.

hiking poles, Kilimanjaro

On day one the climb was already a challenge.  Thank goodness for these poles!  When walking they take off around 7 kg off your feet.  You get to lean forward when it really gets tough and they help you up the uphill parts when your legs can't do the work anymore.

I have to say the hiking poles are a must!  And even if you decide not to walk with them from day one, you will definitely need them on summit night.  That's when I leaned on them the most!

A tip is to adjust them once to the desired length and keep them that way.  They may freeze if you retract them before summit... Mine were quite long as I am tall so that I could pull my feet off the ground.

Even on the downhill, they helped a lot.  The ground is slippery at times and a hiking pole can assist when there are no branches or trees to grab onto.

Yes they make you walk slower and yes at times they are in the way but you walk slowly on Kili anyway...

If you plan to climb just one mountain, get the cheaper hiking poles.  Be aware though, they may not last the trip...

Tuesday, 9 September 2014

Why so much water?


The so called experts advise drinking a lot of water during your climb. But I really couldn't understand how that would help me. I mean I don't drink a lot of water during the day and only have a sip now and then during a training hike.

And who wants to stop for n pee break every hour. Because I have noticed that if I don't sweat, I pee a lot ;) 

Taking a whole hydration system to climb Kilimanjaro felt a bit extreme but I suppose there is a good reason for it...  I only realised this on the way down!

Drinking water helps to hydrate the lungs and brain. Your body is an engine and mostly comprises of water. The air is so dry that snow evaporates rather than melts. Drink water to keep your engine running!

I love this pack from K-Way. It takes a 2l hydration bladder and has some space for n rain jacket. Although a day pack is advised for climbing Kili, next time I will summit with only water and pay a porter extra to walk with my and carry clothes that I may want to take off. 


This pack is available at Cape Union Mart for R499. It does not include the bladder. I also needed to snip off a section of the pipe - it was a bit long. Luckily the nozzle squeezes back easily.

#k-way #capeunionmart #geartesting

Friday, 18 July 2014

Day 6 - Machame - 4 July 2014


I didn't take too many pictures on the way down.  We ran down.  It felt easy to run!  I don't even like running.  From Millennium Camp we walked down a steep walkway and we still needed hiking poles.  There was moisture in the soil and it was actually quite slippery.

We passed through Mweka camp where we should have camped.  It is a lovely tree covered camp and I am sure it would have been much too far for us to reach the summit.

After Millennium Camp the walk was easy - yet slippery.  The rain forest was beautiful.  It was misty all the way and we even put on our rain jackets at one stage.


After arrival at the Mweka Gate, we each had to sign out of course.  We had a cold beer - which Eddie bought at a shop outside the gate - inside the gate was toooooo expensive! You can also have your shoes washed for an amount of course but I decided I liked the look :)

Our transfer was waiting at the gate and it was so unreal being in a vehicle after reaching the summit of the highest free-standing mountain in the world! 

As we arrived flowers waited for our team.  We each had another beer and slowly but surely we had turns in the shower.


Of course we had to repack everything but for now, we would just enjoy the fact that we were on top of the world just a few hours ago....

Route Overview:
Distance:  20 km
Duration:  5-7 hours
Descent:  1990 m

www.africanreignsafaris.com


Day 4 and 5 (Summit) 2 and 3 July 2014

Our guide woke us at 23:00.  We rushed to get our remaining gear on and gathered in the tent for tea and biscuits.

We started the climb about an hour or so later.  We could see the headlamps of the groups that had already started.  It looked like stars! Winding up and up. Our group took it slow.  It was difficult to move with all the clothes and of course no oxygen.  We slowly made our way in the dark.  The temperature was not too bad - we even took off one layer.  We kept seeing the groups in front of us getting closer - so we must be doing well!

All the time guides were encouraging.  They adjusted gloves, hats, headlamps and took day packs from us.

The water really freezes on the way - I couldn't believe it - it didn't feel THAT cold?? My Rehadrat had turned to slush and my water pipe's nozzle froze - I had to chew it a bit for the water to get out.

Ye, h sunrise at last!  But oh no we weren't even close to Stella Point! We pushed on.  It felt a bit easier when we could see where we were going but also more difficult because we could see how slow we were going.

At last at around 08:00 we reached Stella Point.  Our group had split up in the meantime.  A few had fallen back and would only reach Stella.


After some time, waiting for a few of the team we pushed on.  It is not a good idea to wait too long - rather take a minute or 5 and carry on with the journey.

It took us over an hour to walk the last bit to Uhuru Peak.  I felt so alone at a stage - nobody in front of me and nobody behind me.  I just kept on going.  You could see the sign and it seemed so close. I waited for a while so that I would not summit alone. Everybody was exhausted.  Finally we made it!  2 guys were waiting for us with 2 guides.  WE MADE IT!!


Wow what a feeling - it was still so unreal.  We tried to take a few group pics and the first group members started feeling ill.  The guides started walking down.  The best way to feel better is to go DOWN.

I also felt like I needed to start walking.  It is still difficult but I felt less breathless.  As we went down the ground became more loose and sandy.  I ski'd down!

When you get to a stage the road ahead looks flat - ITS NOT! You go down down down.  I think we arrive at 14:00 or so - after being on my feet for so long, I felt so relieved to get to the tent!  I had time to wash my face and hair and get on some lighter clothes.  The others came down in drips and drabs but mostly about 10 to 15 minutes after one another.  We had to pack our stuff and WALK SOME MORE!

Because our group took a bit longer we only needed to get to Millennium Camp.  None the less, we still needed to get going to reach it before dark.

We had lunch, and started walking.  Our porters came running past us to set up in time.  It took about another 2 hours to get to the next camp.

We arrived and had dinner.  The air was cold and still thin but the group felt much better. After dinner we fell into bed and slept until 07:00.  It was difficult for me to find enough breath to sleep well but the group all had a great night's rest.  The next morning we needed to go very far.  Our guide gathered us together and said that it would be hard but that we needed to push on.

Read more

Route Overview:
Distance:  15 km (5km plus 10km)
Duration:  4-6 hours
Descent:  2075 m

www.africanreignsafaris.com

Day 4 - Machame - 2 July 2014

Our group was like a well-oiled machine by day 4.  Packed, breakfast served and ready to climb by 07:00.  We started off with gloves and hiking poles and only after a short walk the guides told us that poles would not be needed.... what was waiting for us????

I didn't do too much reading before we arrived so I had no idea what was up ahead.  I just followed the guide. We started climbing over boulders and ledges.  It was so much fun!  We slid past large rocks on ledges - the ledges were moderate - not too high and not really narrow. It was like playing around on a big playset.  I think everybody enjoyed it. A degree of fitness is definitely needed to enjoy this part of the journey - but if you are not too fit, you will still make it.

After the climb, we reached a plateau with great views and had a snack and water.  Onward!! from this point on it was down down down.  A difficult down I must say. The ground was like powder and you don't really have spots to grip... hiking poles help a lot! But stepping carefully is essential.


After reaching the valley, we had to go up again.  Wow, and what a steep up!! Once you stop you can't get yourself to start again - so don't stop! Up up up, porters passing you up up up some more!  When we reached the top we found our lunch tent waiting! (Karanga 3930m) After a short wait, we had to head on.  Here was more dust and more rocks.  We were now on our way to base camp.  Barafu camp (4681 m).


But before we reached the camp there were more uphills.  It felt like walking on broken slate tiles.  Everywhere you look there were rock towers that people built.  There's not much cover so every large boulder would be a bush toilet - but at least we beat the traffic so that was ok :)


Our sunbeam during the whole trip welcomed us on arrival - only to see that it was not the camp :( Another up up up!!

We pressed on and finally arrived at Basecamp - Barafu Camp.  You could see the summit!  And now we had to calm down and go to sleep!  How was this possible :)

The group had a quick dinner of soup, pasta and vegetables.  We tried to sort out our things for the summit.  It was difficult - racing breath and adrenaline rushing.  We put our heads down and slept for 4 hours....

Read more about the summit

Route Overview:
Distance:  4 km
Duration:  4-5 hours
Gain:  678 m


Summit
Distance:  5 km
Duration:  7-8 hours
Gain:  1222 m

www.africanreignsafaris.com


Thursday, 17 July 2014

Day 3 - Machame - 1 July 2014

We had an early start - getting away while other groups were having breakfast.  It was difficult.  Breathing was becoming an effort and from this point, we had rocks and more rocks around us.  Our goal was to get to Lava Tower.


The temperature was not hot nor cold - however, sunburn would be a danger - we applied and re-applied twice a day.

A buff around your mouth is a good idea if you want to keep the dust away.  The path is long and not very steep but at stages, you can really see how high you are.

Usually, groups climb Lava Tower but our guide told us that it was not safe.


Lava tower is 4642 m above sea level.  It is an impressive piece of rock towering above the rocky desert.

We had lunch inside the tent on this day - it was welcome.  I was glad to see the lunch tent each time.  Slap chips and saucy vegetables with the usual soup and tea.

After lunch, we had about 10 minutes to sit and rest and off we went again.  This time we reached a valley and it felt like we were going down for once. It was another very long and tiring day and my feet started to "make mistakes" by stumbling... I felt exhausted.


Finally, we reached Barranco Camp (3984 m).  This was by far my favourite camp.  We got to sort out our bags outside - no wind - no downhill. I got to wash my feet and also do a hospital bath (hence the small face cloth).  The toilets were actually in a good state and one could even squat in piece. You still need to catch your breath after zipping open the tent but at least the camp was like a holiday :)


After dinner, I felt ill for the first time on the trip.  I took some pain medication and another Diamox and passed out.  I slept very well and felt great the next morning. We would once again get up even earlier to beat the main traffic.  Barranco wall would be difficult and technical.

Read more Day 4

Route Overview:
Distance:  10 km
Duration:  6-8 hours
Gain:  166 m

www.africanreignsafaris.com

Day 2 - Machame - 30 June 2014

After a terrible night's downhill rocky sleep we got up early and enjoyed breakfast.  It included porridge, eggs, warm drinks and fruit.  Lovely.

During breakfast, they fill up water bottles and the scramble starts to get going before the other groups.


On this day it was a steep climb.  A winding path up the mountain between boulders, fynbos-like vegetation and porters all around you.  They almost run past you with a large bag on their backs.  Some carrying gas bottles and other chairs and tables.  They have to rush to the next camp and be set up by the time we get there!

This felt a little easier - there was lots to look at and a few technical ups and downs.  You see Ravens all around and at our lunch stop, we each got a bag with a fruit juice, piece of chicken, boiled egg and half of an orange.  You see the summit all the time - around each corner, you get a different view.  I didn't really realise where we were headed - it felt very unreal.

On arrival at Shira Camp (3847m) the wind was howling.  But what a view.  This is a scenic camp and we had a lot of spare time to rest.  Already we could feel the effects of altitude.  A few people had diarrhoea and headaches.  Others were just taking things slow. The wind was cold - but it felt warmer than the previous night.

After some reorganising and getting ready for the next day we had dinner and dove into our sleeping bags soon after sunset.  The wind blew the side of the tent right into me half of the night.  Everything was dusty and if you don't concentrate you will have a mouth full of sand.  I asked the guide about the wind and he said it was very unusual.

Having some time after the hike and before sunset was really great.  We could chat about the past 2 days and what lay ahead.  We discussed our outfit for the next day and we also decided to get up earlier to beat the "traffic".

Read more Day 3

Route Overview:
Distance:  5 km
Duration:  4-6 hours
Gain:  960 m

www.africanreignsafaris.com

Tuesday, 15 July 2014

Day 1 - Machame - 29 June 2014

After breakfast we would be picked up at 09:00!  The 12 adventurers were very VERY excited.  Gerhard had a small scale with him so we could "weigh in" so to speak.  Here and there we were over by 2 to 5 kg.  That would be US$4 per kilo.  Not a lot of money if you think about it... We took a Diamox (not going for halves but full ones) and off we went!


On arrival at the gate our driver offloaded all the bags and the porters started the big job of dividing everything (including their own stuff) into piles.  Each porter is only allowed to carry 20kg.  What a task.

In the meantime we signed in at the gate - passport numbers are needed so rather take a copy of yours with you.  A pen is a definite yes!


Machame Gate


After the sign in, we each received a lunch pack - which we were supposed to eat on the way.  We filled our water bottles and hydration packs.  We waited and waited and waited and after a long while waited some more.  While the tour operators from African Reign Safaris did some negotiations we waited some more. We were the second group to arrive and the last to depart!


From the very get go the path was steep.  My hiking poles were out - and initially I felt that they were a bit in the way but after a few hours they helped - a lot! I can see how difficult it would be if there was a lot of rain - a little rain for that matter.

The scenery was lovely - large green ferns and moss everywhere.  You don't see or hear any animals and I only saw a large row of ants once.  The temperature is not too high but we were working up a sweat. The day became long and after stopping for lunch and water and pee breaks we just couldn't see the end. A few of us decided to sprint - that's walking fast in Kili terms - to the camp.  We made it just before sun set.  Wow - already above the clouds!  It was already freezing.  I though by myself that if the first night was this cold - how will we feel at summit?


We arrived at Machame Hut at 3020 m, did the first of many sign ins and had warm tea.  They dinner tent not only offered warm tea, but coffee, Milo, popcorn and soup.  After soup we had a stew with potatoes.  After a very long day on our feet we jumped into bed.

The tents were up and each of us had quite a comfortable mattress.  I shared with 2 people but usually you share with only 1 person.  It is a bit of a struggle to do everything inside the tent.  And unfortunately we slept downhill - so not a good first night for me.

The trick is to get to camp with time to spare to change clothes - sleeping in tomorrows outfit - and to re-arrange your bag.  This happens so often that if you do it in the day time it goes much quicker.  The other reason for getting to camp with time to spare is so that you can use the toilets before the masses arrive - before they are too dirty. Unfortunately this is a little messy but if you time it well you only have to use it one - the rest of the time you can go outside :)

Night one done! Tomorrow would be more difficult - so we prepared ourselves mentally.....


Read more Day 2...

Route Overview:
Distance:  11km
Duration:  5-7 hours
Gain:  1210 m

www.africanreignsafaris.com